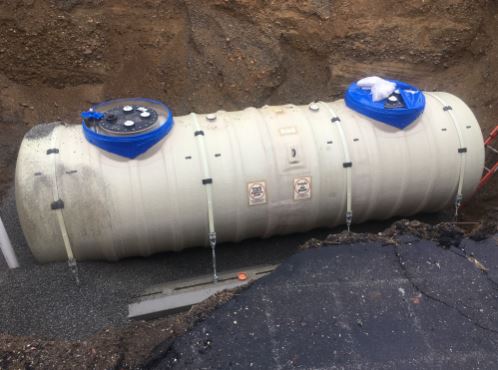
When you see a water tank on somebody’s roof or in their yard, you don’t really think about how it got there. Of course the tanks that you can see are above-ground tanks, so chances are it was simply lowered into position by a truck or crane. It’s unlikely there was much preparation prior to installation. Underground water tank installation requires more effort.
The advantage of placing your tank underground is location. It doesn’t interfere with your floor space, so you can lay a driveway over the tank, or even a swimming pool, as long as you plan it right. You can also achieve greater capacity than you would if the tank was on the surface. The only real risk is that the tank will collapse, sinking whatever is positioned above it. That’s why site preparation is so important.
Another potential challenge is the tank might spring a leak. Since it’s underground, you may not spot the leak in time. So as part of your planning, ensure that your in-ground water tank is inspected and maintained frequently. You also need to work with a plumber to install the necessary pumps and piping. You’ll probably need a water-level gauge, a pump to push water to the surface, and downpipes to collect rain water. You might also require storm drains.
Clear the area
Start with some basic yard maintenance. If there is any clutter or junk in the yard, get rid of it. This isn’t about making an impression. It’s far more practical, because any junk in the yard could impede the path of the truck delivering the tank, or injure the installation crew. If there are any trees, consider uprooting them.
Don’t just remove the surface branches and stumps. Take out the root system as well, because they could continue to grow and perforate the tank. You should also check for any municipal power systems, power lines, cables, or sewers that run under your property. They are likely to dictate the size and location of your in-ground tank. Call your local council to get a site map (and any relevant permission slips), just to be sure.
Once you have the go-ahead, you need to dig a hole. Confirm the dimensions and shape of your tank. Your hole should leave a gap of 18 to 24 inches all around the tank, so the width of the hole will be tank diameter plus 48 inches if it’s round. For other shapes, calculate the length or width of the tank plus 48 inches.

Flatten the bottom
As for the depth of the hole, it should be the height of the tank plus 30 inches. This is important because once the tank is lowered into position, there should be a maximum of 1m of packed earth above the tank lid. This packed refill excludes any concrete slab that may be placed above the rank. When you dig the hole, keep the excavated soil so you can use it to refill the hole after the tank is secured in place. The soil will be mixed with sand and gravel.
The weight of the tank is important, because it dictates the amount of pressure that will be applied on the surface. Include the weight of water in any calculation, because the tank is that much heavier when it’s full. Look at the bottom of the hole and make sure it’s completely level, smooth, and doesn’t have any stones or gravel. The slightest sharp stone could pierce the tank because once the water weighs on it, it increases the pressure of the sharp edge.
Pack the bottom of the hole tightly to make it more stable and reduce its likelihood of caving in. It’s a good idea to lay a concrete slab at the bottom of the hole. It helps keep the ground level and helps it support the tank better. If the hole surface is tilted, then the tank will sit at an angle and the water weight won’t be evenly distributed, increasing the chances of damage, both to the tank and the surrounding surfaces.
Ensure the tank will stand straight
The tank could push against the sides of the hole – which are not reinforced. That could sink anything positioned on the surface above the tank. For the base, use concrete reinforced with steel bars or steel plates. The seal should be completely flat, and about 15cm thick. You could also opt for sand that has been thoroughly compacted.
Sand isn’t as strong as concrete, so if you’re using compacted sand, thicken the layer to 30cm. Check your surface to ensure it’s smooth, flat, and level. Remove any sharp bits or jagged edges and double-check that it’s completely dry. Your site is now ready for your tank to be lowered into position – or poured in place, if it’s a concrete tank.
Read Also: